Concentricity Measurement of Shafts
The Sirona company in Bensheim (Germany) manufactures grinding machines with which dental fillings are produced automatically from CAD data. The demands on the accuracy of the fillings are high, and the equipment must also work with corresponding precision. Although the grinders used in the production are consumables, they must be very precise and their concentricity must be in the micrometre range. With the help of industrial image processing, the products can be 100% inspect-ed in the manufacturing process with high precision.
Definition of the Concentricity
Concentricity is the maximum distance of the curve that the tip of the shaft or slider describes in relation to the centre of this axis during a rotation of 360°. The direction of the axis of rotation is determined by the axis of the shaft.


Measurement of Concentricity
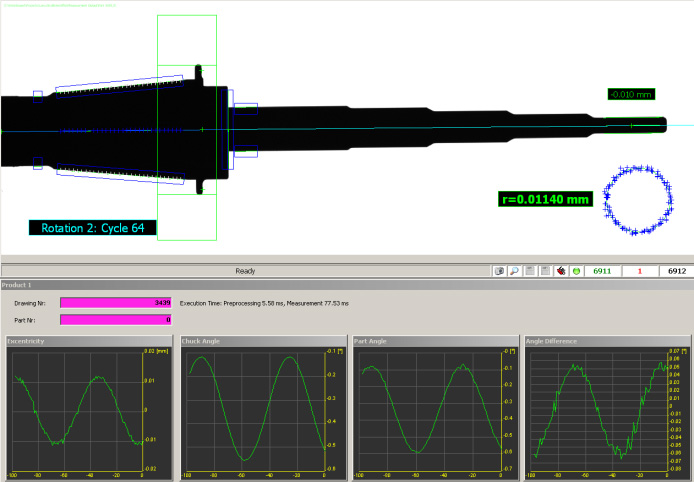
For the measurement of concentricity, the grinder is clamped in a collet and rotated. The image processing system takes 64 images during one rotation of the grinder and determines the axis of rotation and position of the tip in each image.
A 2456 pixel x 2058 pixel camera, telecentric optics and collimated illumination are used to capture the image.
Fig. 2 shows an image in the upper section and below it the measurement of the axis of rotation, the position of the tip and the measurements for the concentricity of the axis and tip. The upper section also shows the result of the runout measurement according to DIN EN ISO 1101, in this case with a radius of 11.4 micro-metres.
Project Procedure
In a first phase, preliminary tests were carried out to check the measurement concept. Thanks to the PC-based VISIONexpert® image processing platform, rapid prototyping was possible. This platform is a PC-based system with highly developed algorithms for dimensional metrology
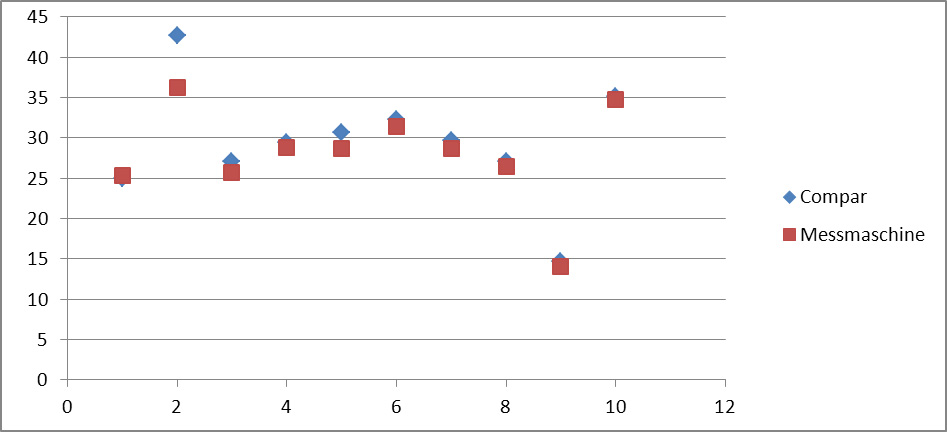
The measurements were checked on sample parts and statistically evaluated. The comparison of the measurements of the image processing system with those of a coordinate measuring system showed a very high agreement of the values (Fig.3). Since all images taken with the image processing system were automatically saved during the tests, individual outliers such as part 2 in Fig. 3 could be analysed more closely. It turned out that the deviations were due to dirt particles, which in turn gave a useful indication of the cleanliness requirements for the realisation.


Realisation
The realisation took place on the same platform on which the "fast prototyping" was done. It went quickly because VISIONexpert® was also the target system.
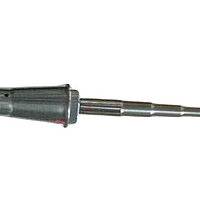
For the automation, an automatic loading of the test station was built, which was realised by a specialised plant manufacturer using an EPSON robot. Fig. 4 shows part of the measuring system.
Conclusion
The advantages of the presented solution are convincing:
- The measuring accuracy of the image processing system is comparable to the one from the coordinate measuring system used previously.
- Thanks to automation, the total cycle time could be reduced from approx. 3 minutes per part to 18 seconds. Thanks to the short cycle time, a 100% inline inspection can now also be carried out on larger quantities.
- Massive savings were achieved in the costs of the inspection system, as the image processing solution is more than a factor of 6 cheaper than a measuring machine based on a coordinate measuring system.
- Bad parts are detected at an early stage and rejected before further processing, which in turn saves costs.
- The measured data can be automatically logged together with the test conditions. Proof of quality and traceability are thus ensured.
Thanks to automation, productivity can now keep pace with the increasing production volume, enabling Sirona Dental Systems to consolidate its position as the world's leading manufacturer of systems and equipment for the dental sector.


